Quick Start
In-Editor Capture
The in-editor capture window is the easiest and fastest way to start making captures.
The capture window allow you to quickly and easily capture videos directly from inside the
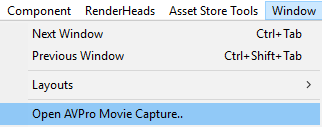
Unity editor without modifying your scene. Simply open the AVPro Movie Capture editor
window from the Window menu bar:

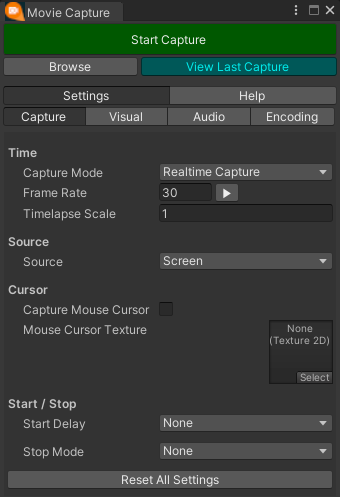
You can now this UI panel to your editor layout to allow one-click video captures, or open and close it as needed.

This panel allows you to configure your recording options and codecs.
The first options to set is "Capture Mode" which controls whether the capture is real-time, or an offline render.
Next "Source" type should be set. This controls where the capture comes from - whether you're capturing the whole screen in general, or from a specific camera, or from a specific camera in 360 degrees.
All settings are remembered between sessions so once it has been configured once you only need to press
the “Start Capture” button. Once a capture starts the statistics of the capture, capture
progress and controls are presented.
In-Game Capture
You can add one of the components (CaptureFromScreen, CaptureFromCamera etc) to your
scene and trigger them to record directly from your game. This works in the editor and
standalone builds.
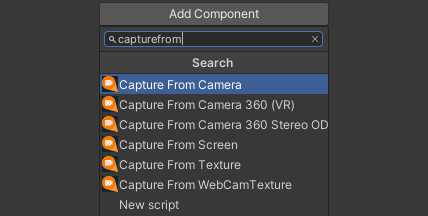
Components can be added via the "Add Component" button on the GameObject

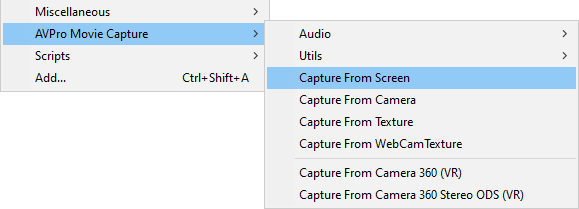
or via the "Component" menu:

See the component documentation for more details on how to configure these beyond the default settings.
Real-time Capturing
For real-time capturing is it important to have the correct capture settings otherwise the capture frame-rate will not be sustainable, leading to video captures that aren't smooth.
Most of the codecs use hardware (GPU) encoding and should be able to handle 4K at 30 FPS without a problem. Beyond that the a powerful system is required and more care must be taken with the capture settings used.
Offline Rendering
For visuals that don’t require real-time input (cut-scenes, procedural / sequenced animations
etc) you have the option to record in offline/non-realtime mode. This mode allows you to
capture every frame of animation even if the playback runs very slowly and allows you to
capture to any desired frame rate.
For example you may have a mega complex/detailed sequence that renders very slowly in
Unity. You can use offline recording to render this to a 60fps video.
Offline rendering isn’t suitable for anything that requires real-time input.
Since this type of rendering can take a while, you can use the Auto Stop option to set how
many frames / seconds you want it to render for
    // Create a 10 second offline screen render
    CaptureFromScreen capture = go.AddComponent<CaptureFromScreen>();
    capture.IsRealTime = false;
    capture.FrameRate = 60f;
    capture.StopMode = StopMode.FramesEncoded;
    capture.StopAfterFramesElapsed = capture.FrameRate * 10f;
    capture.StartCapture();
Demo Scenes
Read about the included demo scenes as these are also a good quick start reference for typical use-cases.